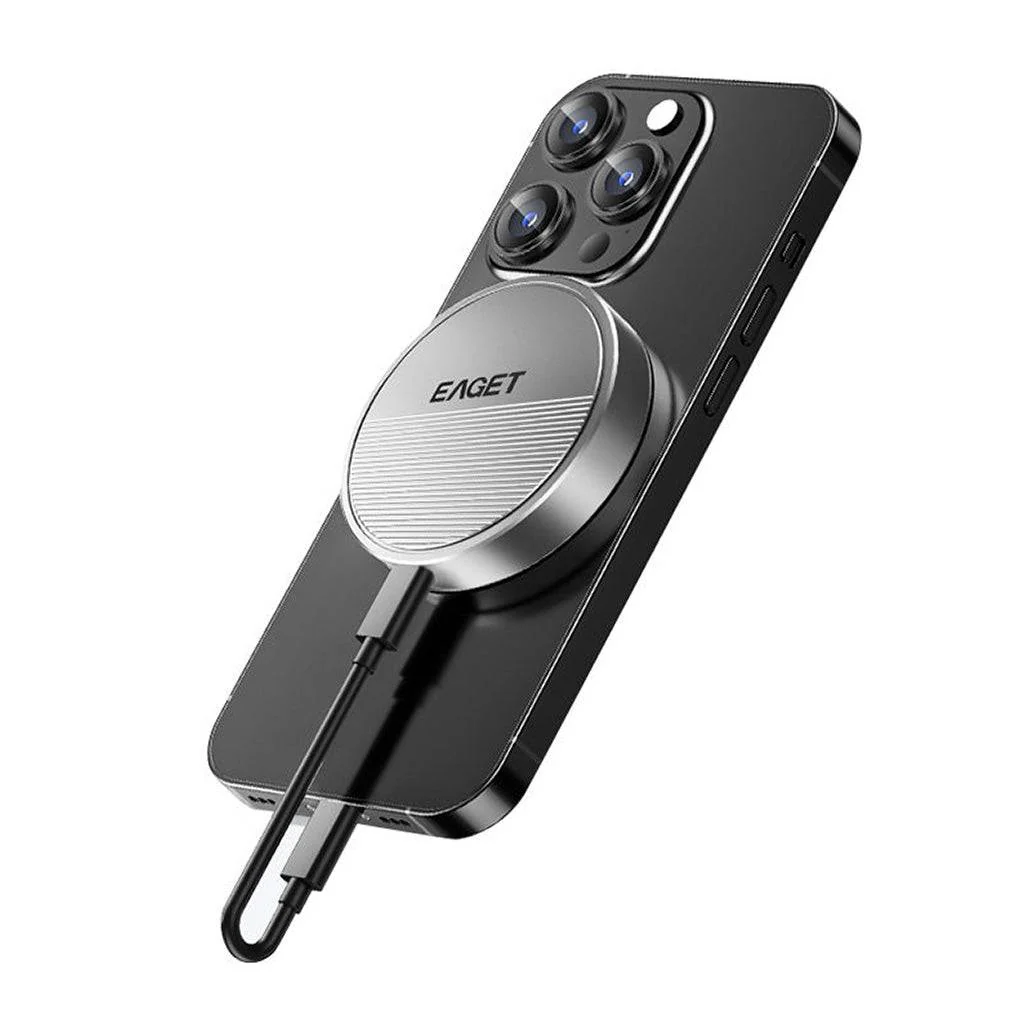
EAGET - SE880 M.2 NVMe SSD Enclosure Upto 4TB Capacity
The Eaget SE880 SSD enclosure delivers blazing-fast connectivity with its 10Gbps USB 3.2 Gen 2 Type-C interface, ensuring seamless transfers for demanding tasks like backing up large files or editing media directly. Optimized for 2230 and 2242 M.2 NVMe SSDs, the SE880 is engineered to securely fit smaller, high-performance drives, removing compatibility worries for users of portable workstations and smartphones. Its durable aluminum alloy case offers improved heat dissipation and rugged protection, safeguarding your data on the move. Installing your NVMe SSD is easy with the included screwdriver, making upgrades or swaps straightforward. The enclosure supports up to 4TB SSD capacity, so users can store massive 4K videos, archives or project files without compromise. With broad device compatibility, including laptops, tablets and phones supporting USB Type-C, the SE880 is the high-speed solution for anyone needing reliable portable storage.
TWO VARIANTS AVAILABLE:
-
Magnetic Enclosure Only: For users who already own an NVMe SSD and want a sleek, durable enclosure.
-
Enclosure with 512GB SSD: Comes pre-installed with a 512GB Ultra-Slim Magnetic Portable SSD supporting up to 20Gbps high-speed transfers for ready-to-use performance.
Note: Setting Up on Windows
When connecting the Eaget SE880 NVMe SSD enclosure to a Windows PC for the first time, the drive may not automatically appear as a usable volume. Follow these steps to troubleshoot and initialize the drive:
- Connect the enclosure to your PC via the included USB Type-C cable
- Open Disk Management:
- Press Win + X and select Disk Management.
- Alternatively, search for "Create and format hard disk partitions" in the Start menu.
- Locate the new SSD:
- You should see the NVMe SSD listed as an unallocated disk or with no drive letter assigned.
- Initialize the disk (if prompted):
- Choose either GPT (GUID Partition Table) or MBR (Master Boot Record). GPT is recommended for modern systems.
- Create a new volume:
- Right-click on the unallocated space and select New Simple Volume.
- Follow the wizard to assign a drive letter and format the partition (NTFS is recommended).
- Complete format and assign drive letter:
- After formatting, the drive will appear under This PC and be ready for use.
- If the disk doesn't appear:
- Try reconnecting or restart your PC.
- Check cable and port compatibility.
- Update USB drivers if needed via Device Manager.
Original: $2,259.00
-65%$2,259.00
$790.65Product Information
Product Information
Shipping & Returns
Shipping & Returns
Description
The Eaget SE880 SSD enclosure delivers blazing-fast connectivity with its 10Gbps USB 3.2 Gen 2 Type-C interface, ensuring seamless transfers for demanding tasks like backing up large files or editing media directly. Optimized for 2230 and 2242 M.2 NVMe SSDs, the SE880 is engineered to securely fit smaller, high-performance drives, removing compatibility worries for users of portable workstations and smartphones. Its durable aluminum alloy case offers improved heat dissipation and rugged protection, safeguarding your data on the move. Installing your NVMe SSD is easy with the included screwdriver, making upgrades or swaps straightforward. The enclosure supports up to 4TB SSD capacity, so users can store massive 4K videos, archives or project files without compromise. With broad device compatibility, including laptops, tablets and phones supporting USB Type-C, the SE880 is the high-speed solution for anyone needing reliable portable storage.
TWO VARIANTS AVAILABLE:
-
Magnetic Enclosure Only: For users who already own an NVMe SSD and want a sleek, durable enclosure.
-
Enclosure with 512GB SSD: Comes pre-installed with a 512GB Ultra-Slim Magnetic Portable SSD supporting up to 20Gbps high-speed transfers for ready-to-use performance.
Note: Setting Up on Windows
When connecting the Eaget SE880 NVMe SSD enclosure to a Windows PC for the first time, the drive may not automatically appear as a usable volume. Follow these steps to troubleshoot and initialize the drive:
- Connect the enclosure to your PC via the included USB Type-C cable
- Open Disk Management:
- Press Win + X and select Disk Management.
- Alternatively, search for "Create and format hard disk partitions" in the Start menu.
- Locate the new SSD:
- You should see the NVMe SSD listed as an unallocated disk or with no drive letter assigned.
- Initialize the disk (if prompted):
- Choose either GPT (GUID Partition Table) or MBR (Master Boot Record). GPT is recommended for modern systems.
- Create a new volume:
- Right-click on the unallocated space and select New Simple Volume.
- Follow the wizard to assign a drive letter and format the partition (NTFS is recommended).
- Complete format and assign drive letter:
- After formatting, the drive will appear under This PC and be ready for use.
- If the disk doesn't appear:
- Try reconnecting or restart your PC.
- Check cable and port compatibility.
- Update USB drivers if needed via Device Manager.