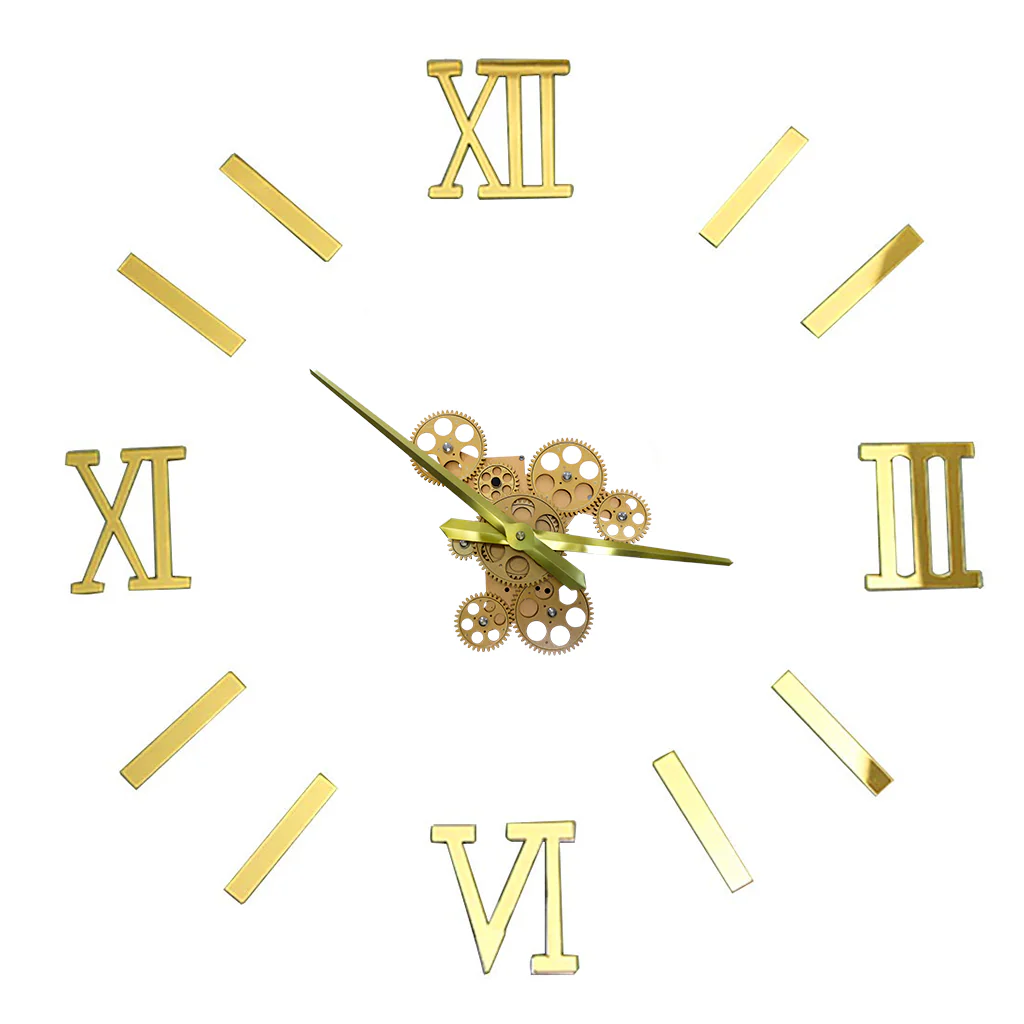
DIY 3D Analog Wall Clock for Home & Office Decoration
EASY DIY CLOCK KIT: This DIY 3D wall clock design offers effortless and unique creativity using mirror stickers. You can conveniently remove the tape and apply the self-adhesive sticker to your preferred wall or surface. Customizing the clock's shape and size is very easy, making it a simple and enjoyable DIY project.
SILENCE MOVEMENT: Embrace a quiet ambiance as the clock's hands and gears move silently, creating a quiet and peaceful atmosphere. The mute movement of the 3D clock hands guarantees an undisturbed night for you to enjoy.
WATERPROOF & DURABLE ADHESIVE MIRROR DESIGN: Enhance your home decor with our waterproof and durable self-adhesive mirror clock. Its modern design and high-quality materials make it a perfect decoration for any room, including hotels, offices, and living rooms.
REAL MOVING GEAR: Experience the mesmerizing view with various gears of different sizes rotating gracefully, creating an eye-catching wall decor piece for your space. The real moving gears clock is a magnificent masterpiece, perfect for adorning your living room, farmhouse, kitchen, office, hallway, bar, and more. Its vintage charm makes it an ideal gift for your loved ones as well.
FAMILY BONDING TIME WITH THE FULLY FUNCTIONAL CLOCK KIT: Building this clock kit can be fun for the family to complete together. The complexity of this kit will bring families together for hours to create something truly special to hang in the home. This model is fully functional when completed.
How To Install
Note: A measurement scale is provided to ensure that the clock numbers are set up in a correct position
Step-1: Stick the clock base on the wall and press for several seconds
Step-2: Hang the paper scale onto the clock
Step-3: Mark the position on the wall (using the paper scale)
Step-4: Peel off the paper from the back of the acrylic mirror and fit it with similar EVA
Step-5: Pull off the back paper of EVA
Step-6: Stick it to the surface of your choice
Step-7: Tear Off the protective film on the acrylic mirror
Step-8: Fix hour and then minute hand onto the gear and tighten the nuts
Step-9: Install AA batteries and adjust the time and you are done!
Original: $1,590.00
-65%$1,590.00
$556.50Product Information
Product Information
Shipping & Returns
Shipping & Returns
Description
EASY DIY CLOCK KIT: This DIY 3D wall clock design offers effortless and unique creativity using mirror stickers. You can conveniently remove the tape and apply the self-adhesive sticker to your preferred wall or surface. Customizing the clock's shape and size is very easy, making it a simple and enjoyable DIY project.
SILENCE MOVEMENT: Embrace a quiet ambiance as the clock's hands and gears move silently, creating a quiet and peaceful atmosphere. The mute movement of the 3D clock hands guarantees an undisturbed night for you to enjoy.
WATERPROOF & DURABLE ADHESIVE MIRROR DESIGN: Enhance your home decor with our waterproof and durable self-adhesive mirror clock. Its modern design and high-quality materials make it a perfect decoration for any room, including hotels, offices, and living rooms.
REAL MOVING GEAR: Experience the mesmerizing view with various gears of different sizes rotating gracefully, creating an eye-catching wall decor piece for your space. The real moving gears clock is a magnificent masterpiece, perfect for adorning your living room, farmhouse, kitchen, office, hallway, bar, and more. Its vintage charm makes it an ideal gift for your loved ones as well.
FAMILY BONDING TIME WITH THE FULLY FUNCTIONAL CLOCK KIT: Building this clock kit can be fun for the family to complete together. The complexity of this kit will bring families together for hours to create something truly special to hang in the home. This model is fully functional when completed.
How To Install
Note: A measurement scale is provided to ensure that the clock numbers are set up in a correct position
Step-1: Stick the clock base on the wall and press for several seconds
Step-2: Hang the paper scale onto the clock
Step-3: Mark the position on the wall (using the paper scale)
Step-4: Peel off the paper from the back of the acrylic mirror and fit it with similar EVA
Step-5: Pull off the back paper of EVA
Step-6: Stick it to the surface of your choice
Step-7: Tear Off the protective film on the acrylic mirror
Step-8: Fix hour and then minute hand onto the gear and tighten the nuts
Step-9: Install AA batteries and adjust the time and you are done!